Lighting effects for photographs, one good idea leads to another! Mr. Ben Bradley is a graphic designer/ video artist from New Zealand with a story to tell! He was so inspired by this Abduzeedo tutorial called Sparkling Hot Girl, that he made this one, and sent it along to us.
![]() Lighting effects for photographs, one good idea leads to another! Mr. Ben Bradley is a graphic designer/ video artist from New Zealand with a story to tell! He was so inspired by this Abduzeedo tutorial called Sparkling Hot Girl, that he made this one, and sent it along to us. It’s not that we like to pass along tutorials, but Ben adds so much more flourish and flash to the Abduzeedo tutorial that it now merits real creativity. Ben writes :
Lighting effects for photographs, one good idea leads to another! Mr. Ben Bradley is a graphic designer/ video artist from New Zealand with a story to tell! He was so inspired by this Abduzeedo tutorial called Sparkling Hot Girl, that he made this one, and sent it along to us. It’s not that we like to pass along tutorials, but Ben adds so much more flourish and flash to the Abduzeedo tutorial that it now merits real creativity. Ben writes :

A lot of light effects are being used lately so here is another cool way to make your images look wicked hot! In this tutorial I am going to focus on how to get the cool patterns rather than the extraction of the girl but I will touch on it. This is my first ever tutorial, so hope I explain myself.
At right is an example of the final file … click for an enlargement. The PSD file for this tutorial can be found at the bottom of the post.
Step: 1
Open photoshop and create a new document File>New. Create it any size you like, for this I made it 800×1000
Step: 2
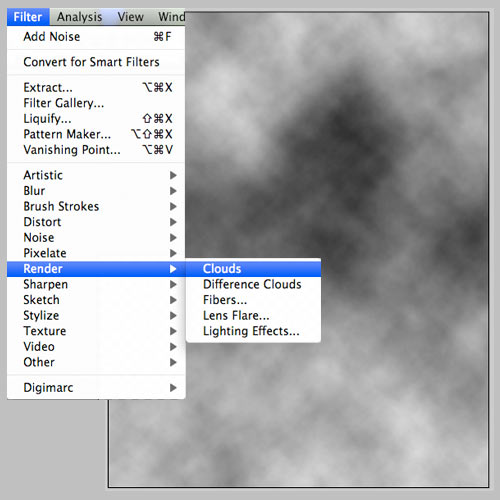
Make sure your foreground and background colours are set to Black and White, you can hit X then D to do this. Create a new layer and name it “Origional” then Filter>Render>Clouds.
Step: 3
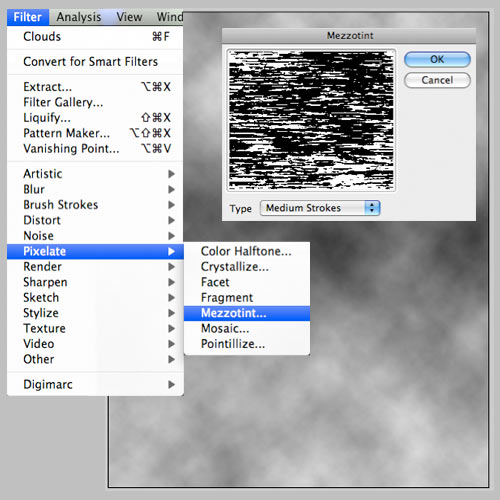
Still in your “original” layer go Filter> Pixelate> Mezzotint… A dialogue box will appear, I choose the setting medium strokes. But play around with the different setting to get new unique looks.
Step: 4
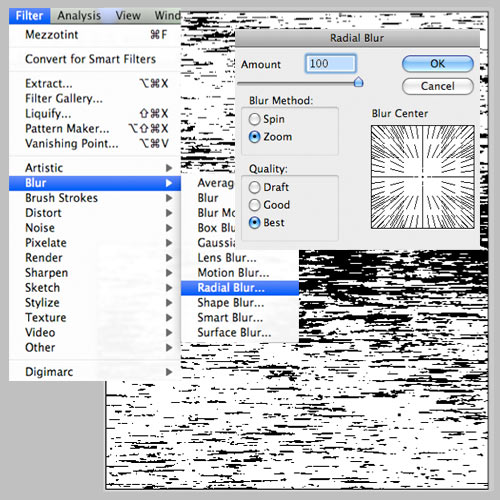
Still in your “original” layer go Filter>Blur>Radial Blur. In the dialogue box make the settings Amount:100, Blur Method: Zoom and set the quality to best.
These next steps are where you get to be creative and decide how crazy you want to go depending what setting you enter for the Twirl dialogue box.
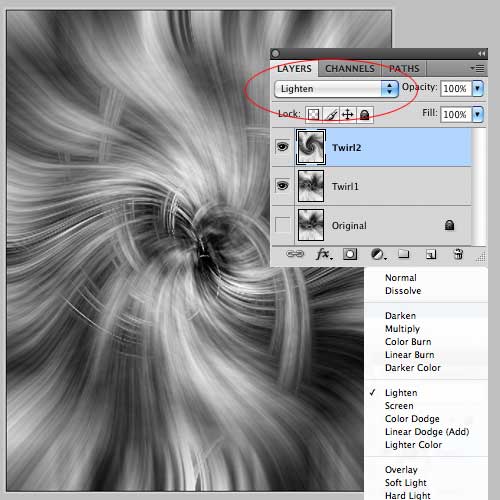
Duplicate the layer called “original” twice and call them “twirl1” and “twirl2” using command/control + J. Now lock and turn the eye off on the original layer. ( I keep this layer just incase anything goes wrong, or if I want to add more later on.)
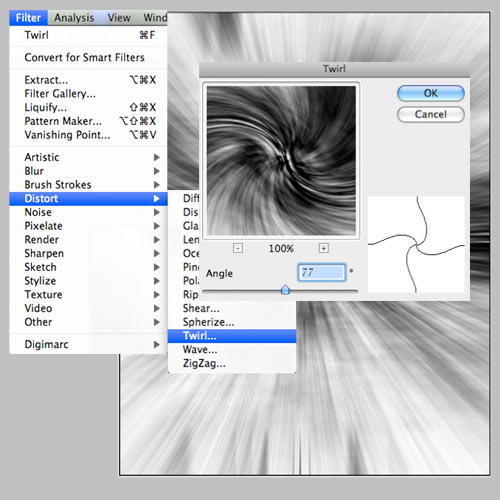
In your “twirl1” layer go Filter>Distort>Twirl… We are going to be doing this step a couple of times and depending on how you want it to look you will enter different settings. For my first “Twirl” I enter +77
Then in layer “twirl2” do the same Filter>Distort>Twirl… but change the twirl amount to (negative) 200. Now change the blending mode of Twirl2 to Lighten. Right, now its starting to take shape!
NEXT : CONTINUE the Effects with Swirls and Color
Swirls and more swirls … then COLOR
Step: 6
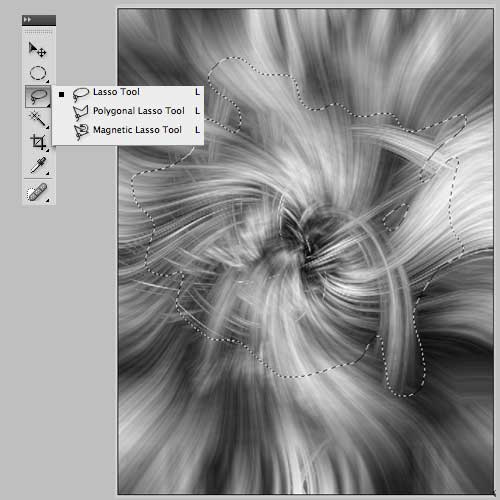
Now we are going to merge these two layers, to do this select both layers and then use command/control + E and name it “swoops” Using the Lasso tool create a selection of your image, try to draw around cool looking swoops and sweeps.
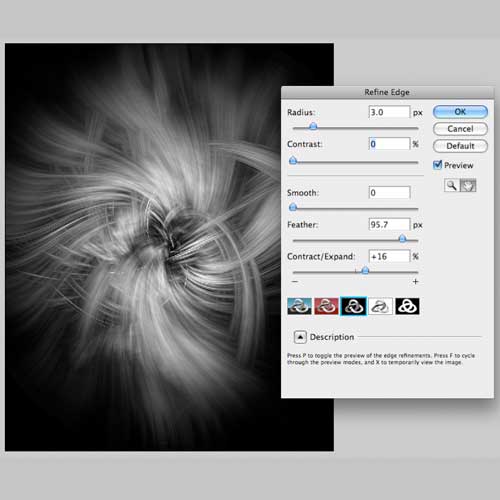
Now right click and select “refine edge” play around with the settings, mainly feather to get it looking similar to mine. Here are the settings I used, but these can differ. Once happy go Layer>Layer Mask>Reveal Selection.
Step: 7
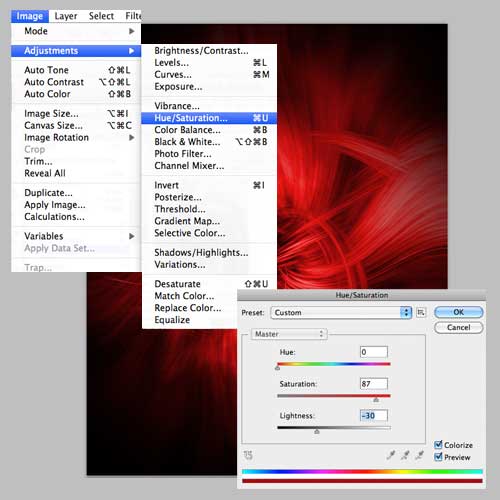
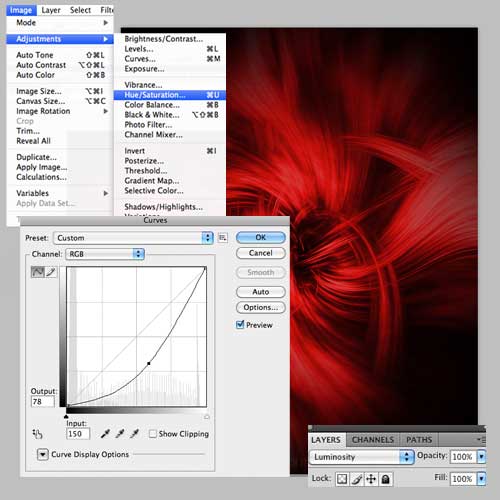
To give some life and colour to this image go Image>Adjustments>Hue/Saturation… Check the tick box colourize and play with the setting till you get something nice. My setting can be seen below.
Duplicate the layer “swoops” Now go Image>Adjustments>Curves… Pull the curve down like I have, and this will put some blacks back into the image to make the lines in the swoops look a lot nicer!
Change the blending mode of the copy to “luminosity”.
NEXT : Now bring in the image of the Girl!
The girl.
This part may take a bit longer for un-experienced photoshop users but stick at it and give it a shot. Open the girl image with File>Place. We are going to use the bezier pen tool to trace the outside of the girl, or whatever you decide is going in the image.
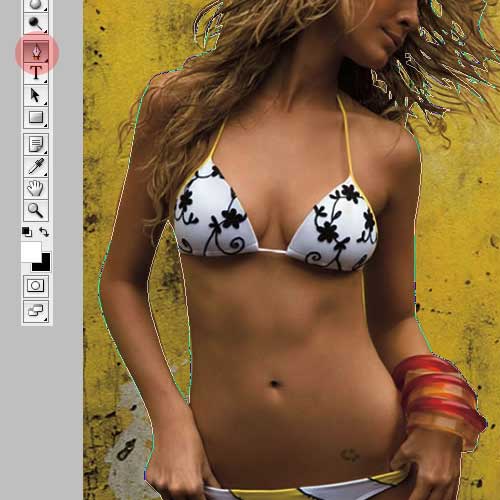
Once you have a full selection, right click and create selection. Now again we are going to use Select>Refine Edge to cut the girl out. You have used this already during this tutorial so again play with the settings till it looks good, a bit of feather will help a lot. Once happy go Layer>Layer Mask>Reveal Selection.
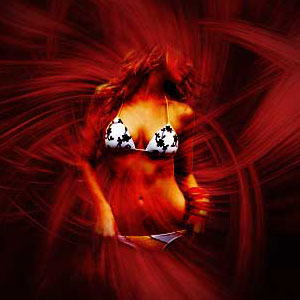
Now change the blending mode to hard light, I do this as it brings some of the background swoops through as if they are coming out of her. Depending on the colours of your image you cut out you may need to trial different blending modes to get a good look.
Image at right … click for an enlargement
Step: 9 – Finishing
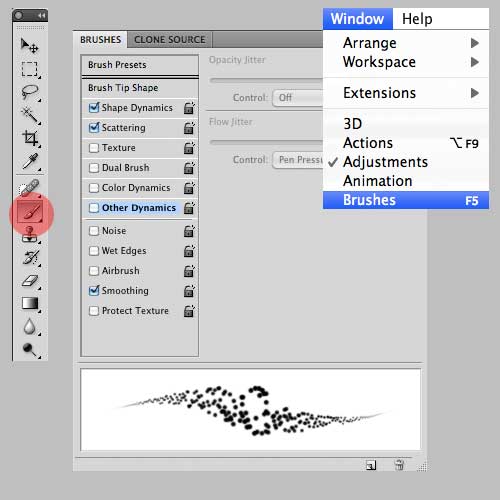
To finish up we are going to add some glowing trails. Create a new layer name it glow trails. Select the paintbrush tool and then go Window>Brushes to bring up the brush settings. We need to add scattering and shape dynamics.

Now double click on the glow tails layer, this will bring up the Layer Style dialogue box. Ad glow and change the blending mode to “Colour Dodge“. Again its up to you how much glow you add and what colours you use. My settings are shown below. Now draw on your funky light trails!
All done! Now you can enhance your image further by adding other colours or adding other assest! Up to you!
Remember this is just a guide and one way to do it! Experiment with each step to get a different look and make it your own!
Ben Bradley,
Creator of www.BenCurious.co.nz
Ben Bradley is a graphic designer/ video artist from New Zealand! I have finally got my web into gear so head over to bencurious to check it out for updates and new work! Also you can find me on twitter @bencurious.
![]() the Abduzeedo tutorial that inspired Ben
the Abduzeedo tutorial that inspired Ben![]() The PSD file Zipped : Originalhotlighteffects.zip
The PSD file Zipped : Originalhotlighteffects.zip
And, thanks for reading
Don’t forget … we encourage you to share your discoveries with other readers: ![]() Send an email to our editorial staff
Send an email to our editorial staff![]() Contribute your own article
Contribute your own article![]() Join the Design Cafe forums, or
Join the Design Cafe forums, or ![]() Follow DTG on Facebook!
Follow DTG on Facebook!