Tom McCracken of NewEvolution has sent in this tutorial that shows you how to create a complicated pattern in Photoshop CC 14.2. This is a tutorial that focuses on Rectangle Tool, Move Tool, Rectangular Marquee Tool, creating patterns, tiling patterns and adding texture.

![]()
Tom McCracken of NewEvolution has sent in this tutorial that shows you how to create a complicated pattern in Photoshop CC 14.2. This is a tutorial that focuses on Rectangle Tool, Move Tool, Rectangular Marquee Tool, creating patterns, tiling patterns and adding texture.

1. Create File
Open Photoshop > File > New… > Name: geometric-wallpaper,
Width: 2880, Height: 1800 >
click OK >
File > Save As… > click Save.

2. Create Pattern
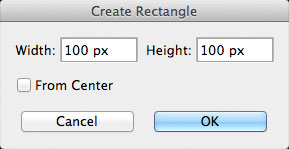
Select Rectangle Tool (U),
double-click on canvas >
Width: 100 px, Height: 100 px >
click OK >
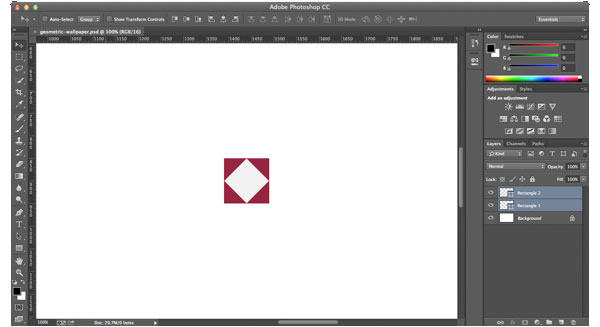
in Layers panel, double-click Layer thumbnail on Rectangle 1 >
set color to #8e1537 > click OK.
Again, select Rectangle Tool (U), double-click on canvas >
Width: 70 px, Height: 70 px > click OK >
in Layers panel, double-click Layer thumbnail on Rectangle 2 >
set color to #f0f0f0 > click OK > Edit >
Transform Path > Rotate > Set rotation 45° > press return >
select Move Tool (V)
in Layers panel, select Rectangle 1 and Rectangle 2
> Align vertical centers, Align horizontal centers.
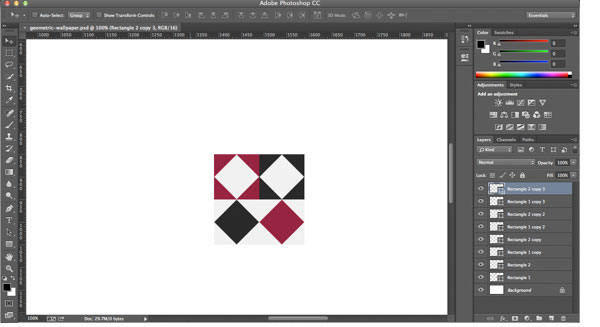
In Layers panel,
select Rectangle 1 and Rectangle 2 >
right-click > Duplicate Layers… >
click OK >
move and snap layers to the right >
double-click Layer thumbnail on Rectangle 1 copy >
set color to #222222 > click OK >
select all 4 layers >
Duplicate Layers… > click OK >
move and snap layers down >
double-click Layer thumbnail on Rectangle 1 copy 2 >
set color to #f0f0f0 > click OK
(Rectangle 2 copy 2 > set color to #222222)
(Rectangle 1 copy 3 > set color to #f0f0f0)
(Rectangle 1 copy > set color to #8e1537).
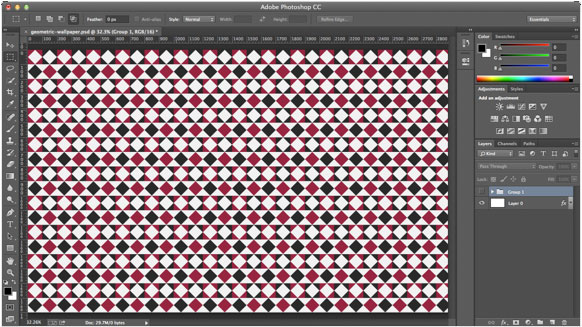
3. Tile Pattern
Select all 8 layers > Layer > Group Layers >
use Rectangular Marquee Tool (M) to select around pattern (200 px x 200 px) >
Edit > Define Pattern > Name: Geometric > click OK >
double-click Background layer to unlock > click OK >
double-click again
> select Pattern Overlay
> select the pattern
> click OK.
Hide Group 1.
4. Add Texture
Download this image to your desktop
> in Photoshop, File
> Place Embedded…
> select texture-wallpaper-49.jpg
> click Place > press return.
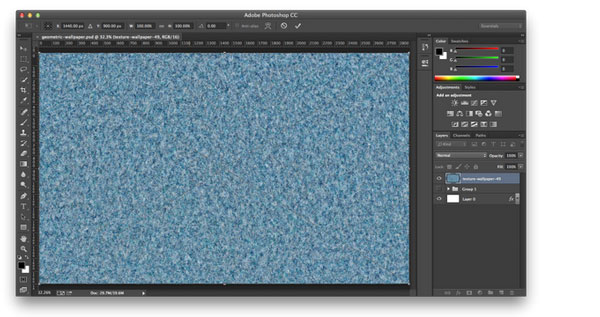
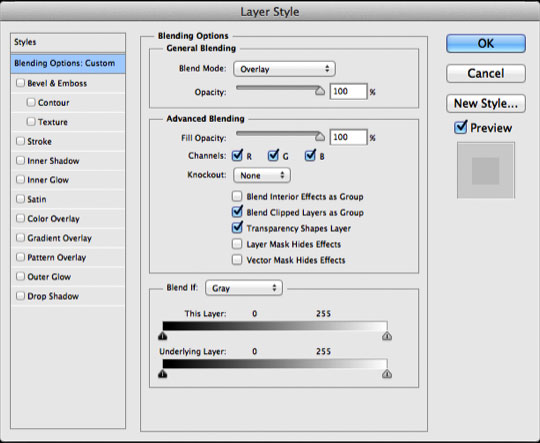
In Layers panel, double-click texture-wallpaper-49 >
Blend Mode: Overlay > click OK.
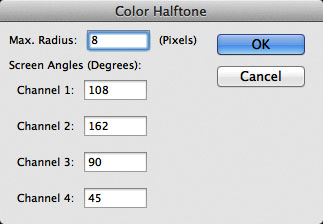
Filter > Pixelate > Color Halftone… > Max. Radius: 8 (Pixels) > click OK.
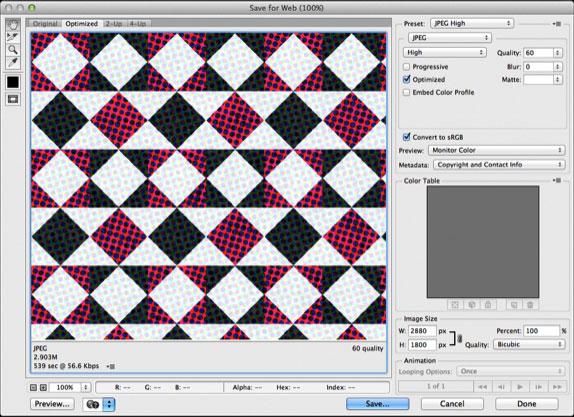
5. Save as Wallpaper
File > Save for Web… > select JPEG > click Save… > click Save.
Group, rename and color layers for organization.
Save Photoshop file. Done!
(To prevent boxes from being cut off on right, make canvas width: 2800 Pixels, but save as 2880 px.)
Thanks to Tom McCracken of NewEvolution for sending in this tutorial! You can download the atual file here: https://newevolutiondesigns.com/images/downloads/geometric-wallpaper.zip! Team NewEvolution is based out of Los Angeles, CA and Bucks County, PA.
 But what ever you do… don’t let Photoshop Madness get you down!
There are always lots of spectacular Photoshop images and visuals out there! Share them! We’ll be back shortly with MORE Photoshop Madness … and please — BE CAREFUL WHERE YOU SURF … but when you do find a great Photoshop practitioner, or a good Photoshop tutorial, please share it with us! If you create Photoshop Tutorials yourself, please post your info here so you can be considered for a Photoshop Fave!
![]() See past issues of Photoshop Madness
See past issues of Photoshop Madness![]() Legacy Photoshop Tips & Tricks web site!
Legacy Photoshop Tips & Tricks web site!
Don’t forget … we encourage you to share your discoveries with other readers. Just send and email, contribute your own article, follow DTG on Facebook!, or Meet up with Fred at ![]() +FredShowker
+FredShowker
Please share your discoveries with other DTG readers:
![]() Send an email to our editorial staff
Send an email to our editorial staff![]() Contribute your own article
Contribute your own article![]() Follow DTG on Facebook!
Follow DTG on Facebook!
The original version of this page is here.