Moving into spring, the colors are coming out, and our friend Ainsley Bevis from BloomWebDesign.net is on a roll with this great Adobe Illustrator -plus- Photoshop tutorial! You’ll enjoy some tricks for illustrating the shapes of a waving flag with stripes, and then the whole piece drops into Photoshop for shadows and highlights, and finishing!
![]()
 Moving into spring, the colors are coming out, and our friend Ainsley Bevis from BloomWebDesign.net is on a roll with this great Adobe Illustrator -plus- Photoshop tutorial! You’ll enjoy some tricks for illustrating the shapes of a waving flag with stripes, and then the whole piece drops into Photoshop for shadows and highlights, and finishing!
Ainsley writes . . .
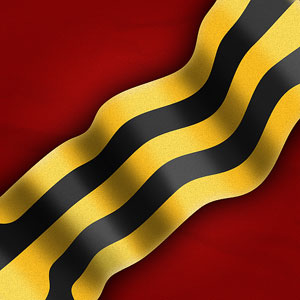
Learn how to create a Retro Wavy Ribbon from scratch using Illustrator & Photoshop! We’ll be using Adobe Illustrator, Envelope Distort and Mesh effects and Gradients to create this authentic looking flag.
Ainsley continues . . .
Illustrator
1. Create a new document in Illustrator, using the Rectangle Tool draw a thin rectangle using the colour your choice. Duplicate the rectangle by selecting it & pull it out while holding down the ALT key, change the second rectangle to a different colour.. Do this until you have 5 coloured rows like below.

2. Select all of the rectangles, then go to Object > Envelope Distort and Make with Mesh.

3. At this stage you can rotate the shape any way you like, I've decided I want it going down diagonally.
4. Using the Direct Select Tool, select a Mesh Row of Anchor Point while holding down the shift key (to select multiple).

5. With the anchor points selected, select the Scale Tool, click on an Anchor Point & Enlarge the chosen Mesh while holding down the shift key.

6. Repeat step 4 and select the 3rd Mesh Row Anchor Points. This time we want to create ripples in the Ribbon, select the Rotate Tool, click on an anchor point and move to create the ripples effect.
7.Repeat the processes to the other Mesh Rows, I've using the Rotate method for the 3rd Mesh Row & the Scale Tool for the Last Mesh Row.

8. You should end up with a nice wavy ribbon.

NEXT we take the whole piece into Photoshop for shading and finishing touches
Photoshop : Gradients, Smart Objects
9. Create a new document in Photoshop that's 550×550 pixels. Double click on the background layer to unlock, then again to go into Blending Options. Put in the Gradient Overlay below:

10. Next download & install these Paper Texture Photoshop Brushes (paper_texture_brushes.zip), create a new layer and put down a paper texture using a light grey.
Click here to pop-open an example with a texture applied
[Editor’s note: most any texture will work, depending on which effect you like best. There are hundreds of thousands of various textures and Photoshop texture brushes on the web, or perhaps you already have a paper texture you wish to use. See: this selection]
11. Next copy & paste the wavy ribbon onto the canvas.

12. While holding down the CTRL key click on the ribbon's Layer Thumbnail (circled above) to select the layer, we will leave this shape selected until we've finished the shadowing and toning. Create a new layer and using a soft edged brush, brush on the shadows on the ribbon.
13. Go to Filter > Blur > Gaussian Blur and put in 9.5 so the shadows spread out more.

14. Set the opacity on the shadow layer to 58%.
15. Create a new layer & set the Blending Mode to Soft Light. Using a white colour soft edged brush, draw on the highlights on the ribbon.

16. Click on the Rectangular Marquee Tool, and click elsewhere on the canvas to remove the ribbon shape. Double click on the Ribbon to go into Blending Options and put in the options below:

Click for a detailed look at above dialogs
17. (Optional) Next create a new layer & place it over all the other layers. Fill the colour white & set the Blending Mode to Multiply so it's invisible. Next go to Filter > Noise > Add Noise and put in 9.51, this will give the design a nice retro grainy effect.

This completes the tutorial. Have fun, and try different variations on the above to customize your results. Also, remember, the basic colors you use are not important. Try it with your flag colors, or the colors for a client or client’s promotion.
Click here for a look at the final results.
And, thanks for reading
Ainsley,
designer for Bloom Web Design

Special Thanks to Ainsley Bevis for sending in this tutorial. Be sure to visit Ainsley at BloomwebDesign.net
Ainsley is a passionate, and mostly self taught, Web and Graphic Designer based in Melbourne, Australia. As well as designing websites and graphic material for her clients she also enjoys playing guitar, piano, walking her dogs and cooking vegetarian food! Don’t miss all her great Adobe Illustrator Tutorials!
thanks for reading!
If you liked this tutorial and would like to see more, just send an email, or click the “SHARE” button below to TWEET it or SHARE it on your favorite networking site!
![]() Contribute your own articles in the Design Center,
Contribute your own articles in the Design Center, ![]() Join the Design Cafe forums,
Join the Design Cafe forums, ![]() Follow DTG on Facebook!
Follow DTG on Facebook!