Thanks to Chris Eissens, who sent in this Photoshop tutorial for beginners — “How To Create A Polar Panorama Effect In Less Than Five Minutes” will show you how to create your own polar panorama effect “small planet” in a view simple steps in Phototshop. It will only take a view minutes to get this amazing effect.
![]() Thanks to Chris Eissens, who sent in this Photoshop tutorial for beginners — “How To Create A Polar Panorama Effect In Less Than Five Minutes” will show you how to create your own polar panorama effect “small planet” in a view simple steps in Phototshop. It will only take a view minutes to get this amazing effect. Chris writes :
Thanks to Chris Eissens, who sent in this Photoshop tutorial for beginners — “How To Create A Polar Panorama Effect In Less Than Five Minutes” will show you how to create your own polar panorama effect “small planet” in a view simple steps in Phototshop. It will only take a view minutes to get this amazing effect. Chris writes :
Earlier this week I showed you a great collection of polar panorama photographics. Which is a technique used in Photoshop to create your own “little planet” from a single panorama photo. In this tutorial I will show you how to create your own polar panorama effect in a view simple steps.
1. To start this tutorial you need to create a panorama photo or get one from the internet. I found this great looking 360 degree shot created by André Karwath and can be downloaded here.

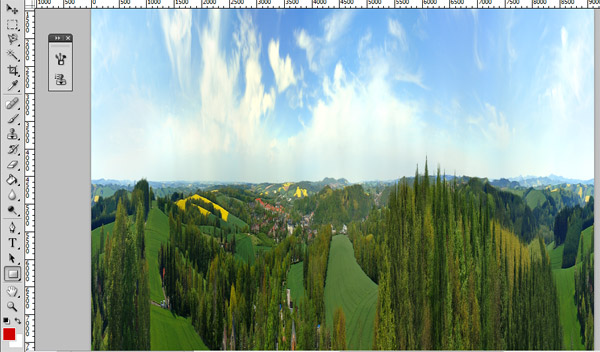
2. Now open this photo in Phototshop — I use Photoshop CS4.

3. Create the file : To create the polar panorama effect we will need a square image, so first we will change the image size. To do this you go to Images > Images Size, edit the height to match the width and make sure that “Constrain Proportions” is turned off.
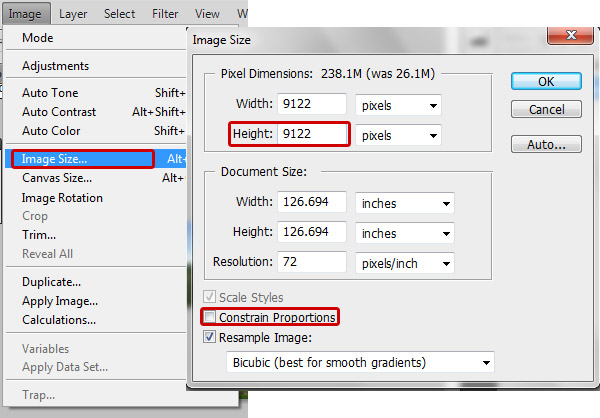
It should now look like the image here.
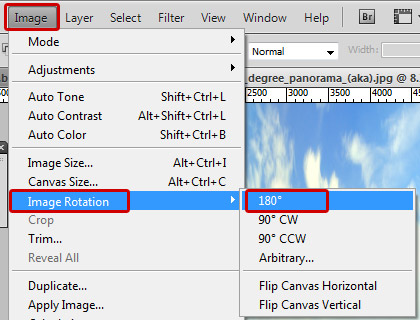
4. Rotate the Image : We now need to rotate the image 180 degrees. Simple click “Image > Image Rotation > 180″
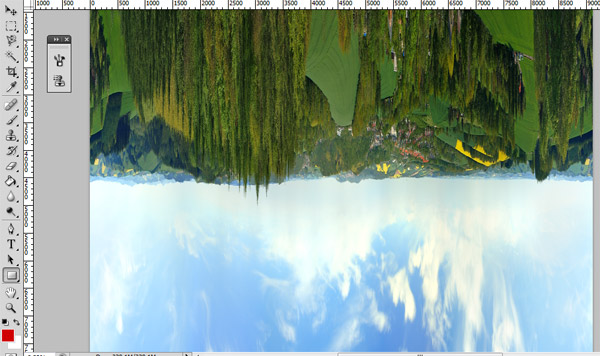
Your work will now look like this:
NEXT : We add the Polar Panorama to the image . . . .
Add the “Polar Panorama” effect
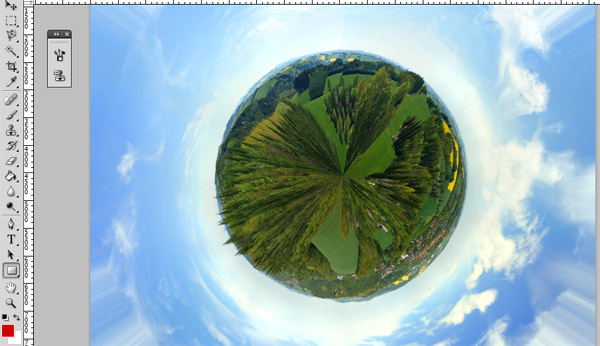
5. Now it is time to add the “Polar Panorama” effect effect to our photo. To do this you go to “Filter > Distort > Polar Coordinates” and click “OK”.

You work will now look like this:
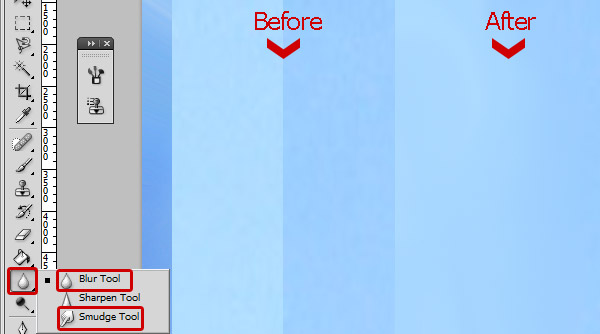
6. Fine Tune your Image : As you can see above, most work has already been done. But if you look closely you will see a line from the top to the middle, to make this look more smooth you can use the “Blur” tool or “Smudge” tool by simple rubbing it over the line till you are satisfied.
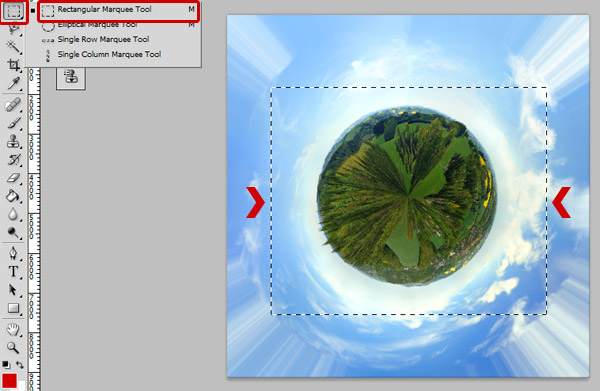
7. Now we simply cut out the “planet” to remove those nasty looking corners. Select the part that looks the best using the “Rectangular Marquee Tool” (Press M), Copy it by hitting the CTRL+C keys and open a new Photoshop window which can be opened by hitting CTRL+SHIFT+N and Paste it using CTRL+V.
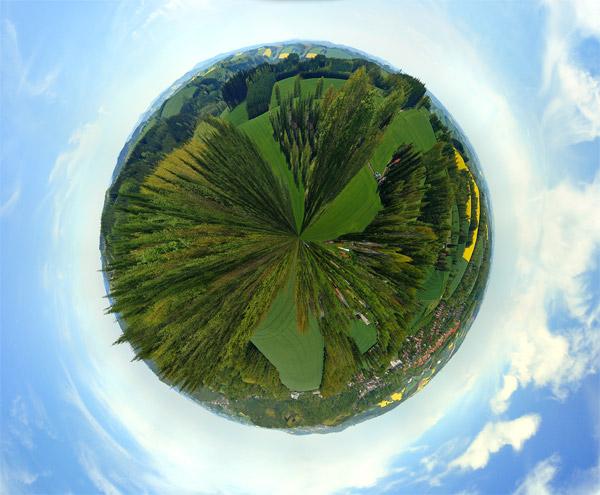
There it is, the final result. It’s that simple. Ofcourse you can add all kind of cool things such as airplanes, rainbows, space shuttles, stars and whatever you can think of to make your work unique.
And here, you can enjoy a world of polar panorama photography!
And, thanks for reading
Don’t forget … we encourage you to share your discoveries with other readers. Just send and email, contribute your own article, join the Design Cafe forums, or follow DTG on Facebook!
And, thanks for reading
![]()
Don’t forget … we encourage you to share your discoveries with other readers. Just send and email, contribute your own article, join the Design Cafe forums, or follow DTG on Facebook!