Next, we’ll create a glow behind the photo subject we cut out using the pen tool in part one of the series. This provides a wondeful contrast to our monochromatic patterned background! Then we’ll demonstrate why color fill layers are so cool by changing the whole image with a single click.
Now we’ve finished work on the background, and it’s time to highlight our subject, and create her glow. Fitting, don’t you think?
Now activate the view of your outlined subject. (Turn the layer on.)
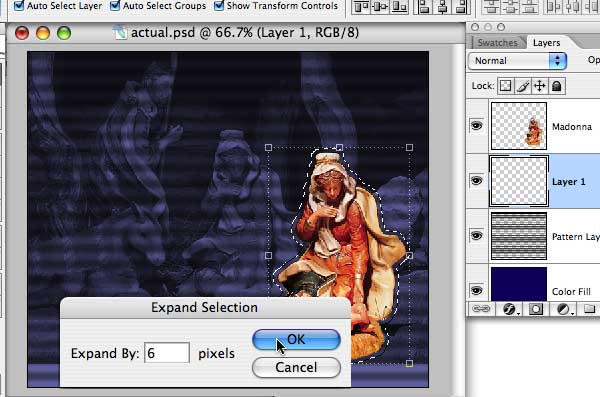
Cmd/click or ctrl/click the layer icon for her to generate a selection based on her outline. You should see racing ants appear. Now, choose
Select > Modify > Expand and add enough pixels to cover at least part of the “glow” we’ll be making. (There are other ways of doing this “glow” but this is the most straight forward and mechanical — for a teachable moment.)

Now click to create a new layer, and move that layer below your subject’s layer. With the selection still active on this new blank layer, fill the selection with white. Now cmd/d or “drop” the selection. This will be your “glow”.
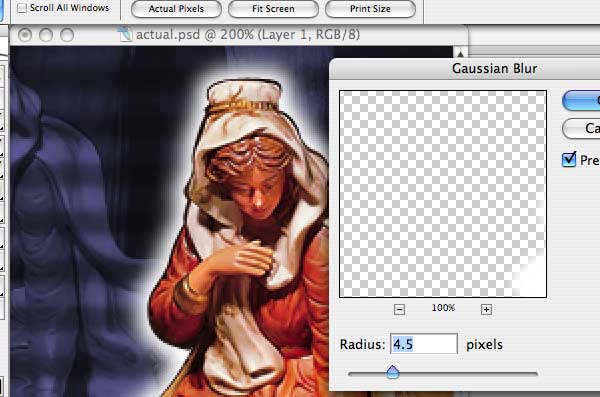
Now select Filter > Blue > Gaussian Blue, and set the amount of blur that looks right to you. Don’t go too far, you want to retain some pure white around the subject.

Fine tuning and modifications
At this point. You’re done. Here’s the finished product… so far.
Well, as usual you would guess that I would have more to add. Remember that you can go back in and adjust any of the layers to change and fine tune your file. You could make the “glow” yellow, or another color. You could raise or lower the opacity of either the blue color layer or your pattern layer — or both. This is a truly flexible file.
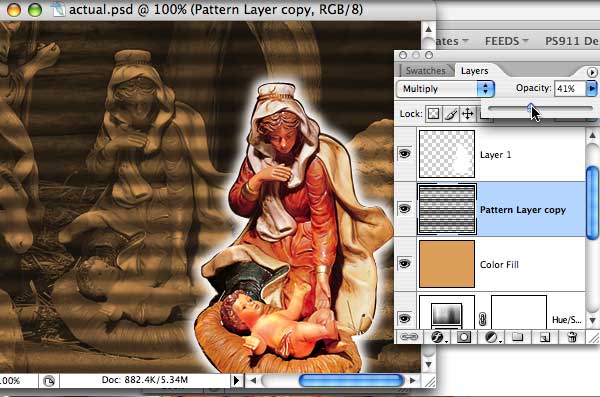
I don’t like the blue. It was okay for a hockey player — since blue is one of the team colors, but for a holiday twist, for this nativity scene we need something more warm. Let’s try a brown for that color layer. No, brown doesn’t look good. Let’s try picking up a color from the subject…

Use the eyedropper tool to select a color — I’ve selected sort of an orange-gold. Now re-fill that color layer with the new color. If you don’t want to lose your blue, then just duplicate the layer and fill that one. In this way you can modify and refine your art until it’s perfect. Here’s our final final, which is very much in the spirit of the image from our reader.
As always, I look forward to your comments and suggestions for our Photoshop column — just pass along your input!
Happy painting … and thanks for reading…