| Taking Better Pictures with your Sony Mavica A brief introduction with tips and tricks on getting better digital photo results. Ernest von Rosen (August 1998) |
|
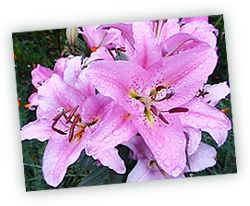 Get
good colour saturation by shooting late in the afternoon. These lilies were shot
just after supper after a rain shower. Get
good colour saturation by shooting late in the afternoon. These lilies were shot
just after supper after a rain shower. |
So, you've picked up (or are considering getting) one of the Sony Mavica Digital
cameras and now are wondering how to get your photos to shine a little more than
the rest. I've had mine for several months now and though it isn't as fantastic as
some of the newer megapixel cameras, I've found that if you understand the abilities
and limitations of the Sony Mavica you can take some quality pictures. As you will note below, there is quite a bit of post-processing that you may need to do with your pictures so it will be helpful if you are comfortable with Photoshop, or a similar photo editing program. For all the examples shown, I'm using the new Photoshop 5.0 on a PC, though for the majority of techniques shown you will be able to replicate them on similar photo editing software packages as long as they support "layers". Basic settings for your Mavica Camera |
| TIP #1: Cleaning up dark images | ||
 Photo #1: The original photo reduced from 640 pixels to 150 pixels wide |
 Photo #2: Duplicate the layer and set the mode to "screen". Opacity is set to 55%. Over all sharpening by using unsharp mask (I used amount=87%, radius=0.6, threshold=0) |
 Photo #3: To increase colour saturation and definition add a third layer and set to "softlight". Opacity is set to 78% |
 Layers Palette: Experiment with layers, the combination method and opacity levels. Lighten dark images by using "screen". For photos with poor definition, duplicate the layer and use "multiply". To add "zap" to a picture, use "soft light" with opacity of your choice. Sony Mavica Digital camera information is available from the Sony website |
||
© 1998 Ernest von Rosen (ernest@amgmedia.com)