This tutorial was prompted by a Photoshop 911 reader who wanted to know about techniques that would allow the merging of a symbol into a person’s eye. We run through several layering techniques — but also discover that what you want isn’t necessarily what you get.
A reader from the Photoshop 911 forums writes in to ask about blending two images into one — writing:
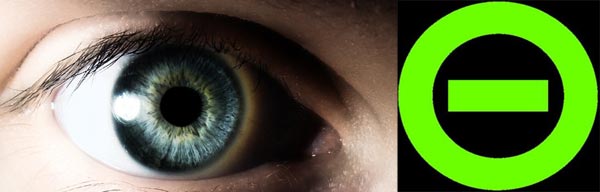
I’m trying to create a nice graphic with these two images: (samples provided) and I want #2 to go over the eye to create a cool eye-design effect but I don’t know what the heck to do. I already know how to erase the background from the #2 image and everything but when I paste it over top of the #1 image all I know to do is try and change the blending options which does not work, it just looks crappy. Can anyone provide me with some help? I want it to look really neat, like the #2 design is actually part of the eye!
An eye for an eye
You’ve got everything you need for an interesting effect. I’m thinking it’s not the actual symbol in the eye that will do the trick here, but the luminosity of the symbol. Let’s try that.
I begin by dragging both images into the same new file — mainly to easily and quickly get them both to the same resolution, 72ppi, for this tutorial. Your project may require otherwise, so you could have just as easily dragged the symbol into your “Eye” file.
Before dragging the symbol, I used Select > Color Range to isolate the green of the symbol. Didn’t get all of it with a setting of “4” fuzziness, so merely went back and selected Select > Similar. Since there appears to be only two colors in the file, that was the charm. This way, only the symbol itself came over, leaving the black background behind.
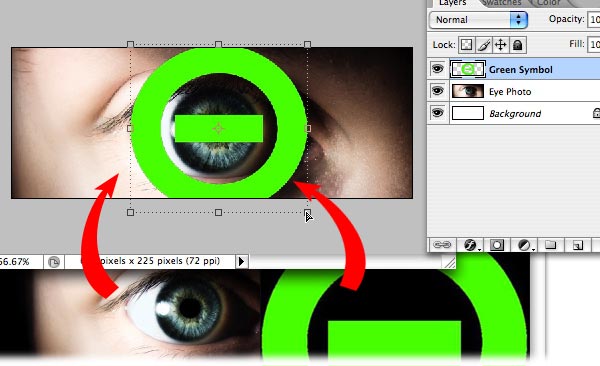
Upon arrival over the eye, scale the symbol to fit.
Since there’s so much dark already in the iris of the eye, I knew that multiply and most of the other blending modes would not give very satisfactory results. We need to boost some color in there.
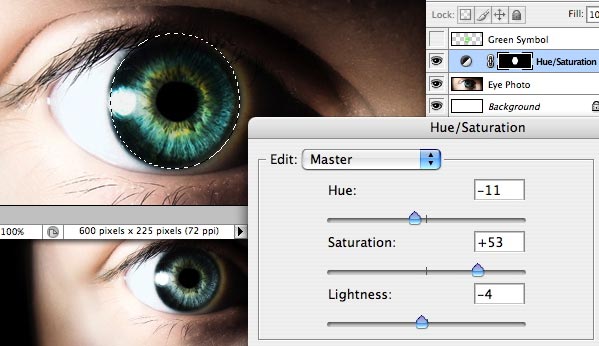
I selected the color part of the eye using the elliptical marquee. (Remember, as you start dragging with that tool, the spacebar will intercede and allow you to move the circle around until it matches perfectly)
While selected, I generated a Hue/Saturation Adjustment Layer (Layer > New Adjustment Layer > Hue/Saturation) and then cranked the saturation way up. I also shifted the color slightly towards the green values for color compatibility. (Drop the selection cntrl/D ; cmd/D )
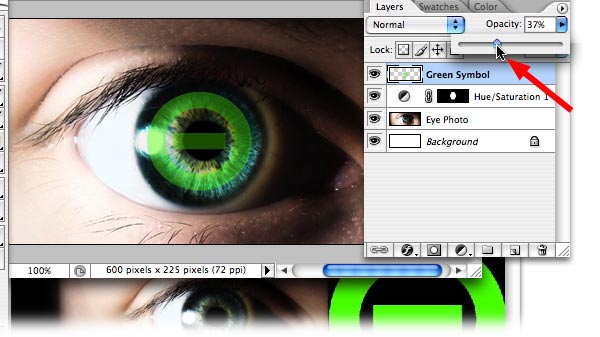
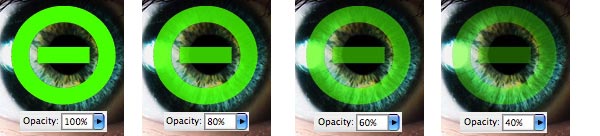
Returning to the symbol layer, make it active, then use the Opacity slider in the layers Palette to blend it in. The degree of transparency depends on how vivid you want the symbol to be. Here are steps.
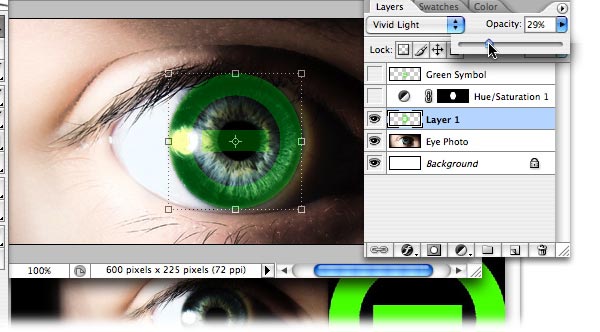
That’s not looking too swell to me, so, let’s try another effect. Turn off the two previous layers. (Click on their eyes) Now drag in another symbol. This time I scaled to match the iris as closely as possible. I set it to a blending mode for “Vivid Light” and Opacity to about 30. STILL now the results I originally thought I wanted.
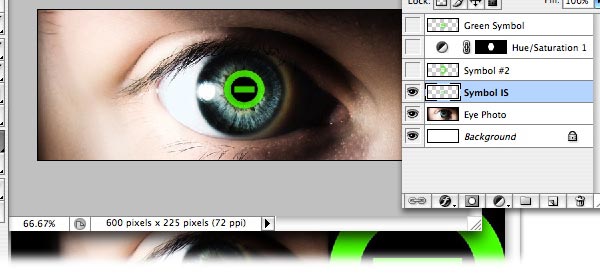
Another try, with the symbol actually becoming the black center of the eye, seems to give the most impact. I realize these two images really don’t work together as originally envisioned. Sometimes it takes several tries to discover that what your mind saw is not really making for a truly memorable statement.
Thanks for reading…
![]()