Continued from the Previous Page
Photo to Pencil Sketch
Tim Shelbourne writes...
 (10) Now you can begin sketching...
Be sure that the foreground color swatch is white.
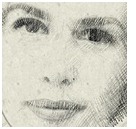
In the Options bar, increase the size of the brush to between 20 and 25 pixels. Now begin to scribble onto the Sketch Layer's layer mask. At first, just concentrate on the main facial features within the image. Use just a little pressure on the stylus, or a very low opacity for the brush.
Scribble loosely over all of the required parts of the image, changing direction often to create a hand-shaded look.
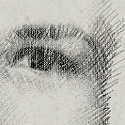
 (11) Use plenty of cross-hatch scribble where the strokes overlap in opposite directions. Remember, there is no actual drawing ability whatsoever required here, we are simply scribbling to reveal the layer lying beneath the Layer mask.
 (12) Increase the size of the brush a little by using the right-facing square bracket key on the keyboard.
Continue to scribble over the image, remembering to keep the brushwork nice and loose, building up the tones around the features of the face. In the hair, and around the outside of the image, use the brush at a bigger size and make the strokes even more sketchy.
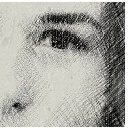
 (13) Finally, reduce the size of the brush again and use it with white at full opacity to scribble more into the main features, adding some really dark strokes.
See the "Before & After" with a rollover to compare the work to the original photo
Tip FEEL THE PRESSURE!
In exercises such as this, using a pressure-sensitive graphics tablet has huge advantages over using a mouse. Many of the special brushes in Photoshop, such as the one we're using here, have characteristics that can be set to respond directly to pressure. Although this exercise can be completed with a conventional mouse, the opacity of the brush has to be controlled manually in the Options bar. When using a graphics tablet we can simply apply more pressure to the stylus to create darker strokes. Graphics tablets are relatively cheap nowadays, and stunning results can be achieved with even the most inexpensive models.
Good luck and keep on Photoshopping!
Get the most out of Photoshop with
Photoshop Photo Effects Cookbook
by Tim Shelbourne
 Adobe Photoshop CS2 offers professional and amateur photographers, artists, and designers unprecedented opportunities to manipulate images on their personal computers, but it's a complex application that can take years to master. With Photoshop Photo Effects Cookbook, you don't have to be a Photoshop expert to create sophisticated effects. The 61 easy-to-follow, fully illustrated recipes in the book show you how to use Photoshop CS2 to simulate classic camera and darkroom techniques and special effects-without making you first learn Photoshop inside and out.
Author and digital artist Tim Shelbourne has assembled a collection of real-world techniques that you'll be able to apply immediately to your own images, whether you're working on photographs or digital illustrations. Digital files of the examples in the book are available for download, so you can easily follow along as Tim takes you through each recipe.
MORE:
Download Tim Shelbourne's Watercolor Effects from the Photoshop Photo Effects Cookbook - 61 Easy-to-Follow Recipes for Digital Photographers, Designers, and Artists 15 MB PDF Format)
 Photoshop Blending Modes Cookbook for Digital Photographers
... with 48 Easy-to-Follow Recipes to Fix Problem Photos and Create Amazing Effects, By John Beardsworth ... Layer blending modes have been part of Photoshop for years, but they're not easy to understand at first glance. Sample Excerpt: Ultrawide Sharpening & Vibrant Mix (PDF Format)
 Photoshop Retouching Cookbook for Digital Photographers
... with 113 Easy-to-Follow Recipes to Improve Your Photos and Create Special Effects By Barry Huggins ... tells you everything you need to know to adjust, correct, retouch, and manipulate your photographs-without making you first learn everything there is to know about Photoshop CS2. Sample Excerpt: Motion Blurring and Removing Skin Blemishes & Wrinkles (PDF Format)
Adobe Photoshop CS2
Upgrade price from Photoshop xx: $149.00
Upgrade price from Elements: $499.00
Photoshop CS2 full package: Save up to 30%
Return to: Photoshop Tips & Tricks, or the Design Center Front Page
Participate in your Design Center
Lots of fun and information for all... don't forget, any community is only as good as the participation of its members. We invite your tips, tricks, comments, suggestions and camaraderie.- Ask for the DT&G Monthly: to receive DT&G newsletter each month, happenings in the Design Center and regular columns like the "Mail Bag" and "Cool Sites"
- SUBSCRIBE : to the Designers' CAFE email list
- Link to this site, and then show us the link. We'll send you any of our current door prizes, just for your trouble.
- Help Support The Design Center: with your donation, we say thank you with free books, listings, and even links on the front page!
- SUBMIT: a news link, new font, or product review
- SUBMIT: a link to a Photoshop web site

